
A facelift!
My blog has looked the same for several years, so I thought it was time to freshen it up.
A couple of weeks ago I was playing around with layout options, and I ended up losing my original! I wasn't actually prepared for that, and was in a mad scramble to get it back. I couldn't find my original Wet Paint artwork anywhere! I put up a couple of place holders for all of 15 minutes each, then in desperation pulled up Procreate and created this one below as a substitute until I had more time.

I don't know if I've shared any process steps for my digital Procreate pieces yet, but here is how I built up my newest title page/ banner/ header.
I began with this piece of embossed paper (using an embossing folder from Spellbinders). I photographed it and cropped it to the size I wanted.


Here I experimented with the splatter brush in the spray paints. I just threw different colors down and then went in with the smudge tool, and smudged it up a bit here and there. So, below, you're just seeing two layers - the original photo of the embossed paper, and the splatter layer.

Next came the words (layer 3). I chose my typestyle and size in white. Then, copied and pasted the same text, but positioned it slightly below and to the right of the original. This created layer 4. Using the adjustments, I took the brightness of this second text layer down to black, and positioned it behind the first text layer.

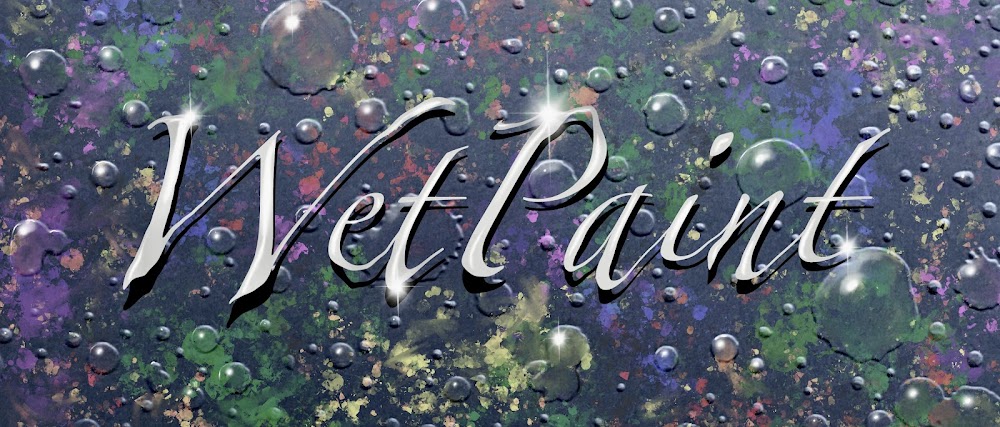
When I had that the way I liked it, I merged layers 3 and 4 into one text layer so that I could do the next step - LIQUIFY. I love liquify! It is also under adjustments. I just "pushed" the text around to distort it a bit. I also dimmed down the brightness again because I wanted highlights to show up.

In the final, top layer, shown at the top of the page, I've added bright white highlights to the letters and to the water droplets.
These are highlights using the flare brush under Luminance. I created them on two different layers so that the second one could be turned vertically. I then moved the vertical flare over the top of the horizontal flare, and then merge them onto the same layer. After that I copied and pasted as many as I wanted. They all ended up on different layers, but that makes them easy to move around, and size-adjust as needed, and they can always be merged into one layer if I like.

Thanks for stopping by!
No comments:
Post a Comment